NKPdesigns

Friday, December 26, 2008

Wednesday, December 24, 2008

Christmas Eve Beads

These are a few which came out of the kiln this morning. Potters are always saying that each time they open their kiln, it is like Christmas morning, and that is true. Christmas is about surprises, the biggest surprise of all happened when God revealed Himself to the world through His Son. Jesus Christ, wrapped Himself in flesh and was born of a Virgin some 2000 years ago. Amazing love ...


So whenever I say "It's like Christmas morning opening the kiln," I'm not actually thinking of wrapped presents under a tree, but the way Jesus Christ wrapped Himself in flesh and entered this world -- the biggest present ever presented to all of humanity! Tomorrow will be a day I'm thinking about that as I'm taking these out of the kiln.

Tuesday, December 23, 2008

New New New


It is like I'm having the 12 days of firings and I'm on day 9. Lol! During Christmas break I'm trying to push myself and do new and different things with either glazes or forms or both.


These are a small textured nugget/round that I used a lowfire speckled glaze on. Most of the color burned out at the higher temperature, but it took the crystals and melted them in streaks and dots marvelously. The flower texture underneath is delicate, but easily seen.


This started out as a small porcelain round. I took some purple colored porcelain and rolled a tiny rope, attached it and applied a texture on top. This technique is facinating to me. I used some gray porcelain in this same manner in this batch, and I also combined the two colors together with textured ropes and dots.


I combined two glazes, one low-fire and the other mid-range fire to get this variety of colors. It is interesting and I do like it, but it would be somewhat challenging I think for a jewelry designer to pull all these colors together in a cohesive look. I do like how they came out, though.


These are the ones I am most excited about. The cobalt gloss glaze performed well in the indentions on each round. I want to find some more transparent glazes that will do this same thing.

Click on any of these photos to see the details of each bead and thanks for dropping by!

Monday, December 22, 2008

For Your Beading Perusal


Here's this morning's batch. I have one last and final white sprigged bead ready for the Yahoo Beads of Clay bi-annual bead swap. This last one was to finish off the batch of 15 that I signed up to be a part of. In the original batch, one didn't make it through the firing. I put a tad too much glaze near the hole and it melted onto the rod and it would not be removed! That happens to a few beads each batch. It's all part of the process.

The rest of these are small squares/rectangles and nuggets that I coated with a low fire china sea crackle glaze that I pushed to a much higher temperature. They turned out a nice transparent forest green. I also applied this same glaze to two smaller white sprigged beads. Mmmm... I like them. Do you?

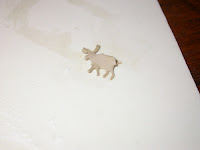
Also in this batch two of the moose pendants that I played with last week. Note to self: do more of these!

Sunday, December 21, 2008

Today's Bead Batch


I'm firing beads and listing as often as I can while I can. I'm pushing myself to attempt new glaze combinations, and these swirly smooth greenish brown rounds are my latest attempt. I had some shiny yellow rounds that I was not impressed with so I reglazed with another color on top. It's kinda like painting a wall in your house and putting on one color of a layer of paint on top of another underneath and the tone of one combines with the other to make a whole new color. With these are some varied textured rounds, too. Click on the photo to get a better look at all of these beads.

I used a different glaze on these blues than I normally do. I found a transparent cobalt blue glaze and all I did was fire this lowfire glaze at a higher temperature. These look identical to the two step process I had been using of first applying a cobalt blue stain and then a clear gloss glaze.

Saturday, December 20, 2008

Fresh From The Kiln


This is what came out of the kiln this morning. This bowl has some pink delicate scroll rounds, a bit bigger beige textured rounds of a new glaze that I am experimenting with ... I love how the scroll texture appears to be climbing out of the glaze instead of being recessed into the glass.


These whites are a new design for me. I'm thinking about putting together a video tutorial to show how they are done. This is an enjoyable bead to make and I am playing with all sorts of ways of applying these sprigs of clay.

Friday, December 19, 2008

Beads 12-19-08


These are the very last of the Porcelain Cane "Santa Fe" that I created a few months ago. It wasn't a large cane, per se, but I don't know if I'll be able to recreate it or not. I somewhat like the fact that there might only be this and no more. Truly a bit of One of a Kind (OOAK).

The others are the last of the batch of celery glazed beads that I mixed up from two separate glazes. I named them "Salad Greens" because they are also the color of iceberg lettuce.

In the kiln today are some scroll texture beads with a new glaze that I bought and never have used before. I don't know if it will come out like the commercial sample or not. We'll see. Also some pink delicate scroll beads, and I glazed some more sprigged beads with a clear gloss. It's all fun!

Thursday, December 18, 2008

Moooooose


I have had an idea in the back of my head for a while and today sat down and implemented it. The question was how do I treat porcelain clay like paper in order to use this moose die? The answer was to roll out a small amount of clay paper thin and coat it with either spray oil or baby powder. My first attempt was to spray the moose die with oil. Miserable failure. I cleaned it out and my second attempt was to sprinkle the paper thin clay with baby powder. That worked. I was able to slide in the clay and press down to cut out the clay moose. I had to hold it with one hand and gently lift out the moose with a small tweezer. I ruined quite a bit of them this way.


Enough survived, however, to put onto a pendant shape. The baby powder kept the moose(s) from sticking, so I simply wet the pendant and pressed it onto the paper thin clay moose. Success! Yay!


These are what I ended up with. This was fun to do but it sure did make a big mess in the studio. I have seen this type of thing be done by polymer clay artists and silver clay artists, as well. Now I have tried it, too. Fun!

Today's Offering


I pulled these out of the kiln this morning. Some have a scrolling texture pattern and others are a smooth round. I used a blue rutile glaze on them. The color variation from bead to bead is slightly different.

Wednesday, December 17, 2008

Bowlful of Greens


This is a bowlful of Green beads which I took out of the kiln this morning. Already another batch is being fired. While I can, while I have the time, I'm going to fire as much as I can. This batch was a great experiment in mixing two commercial glazes together to achieve a new color. I took a light translucent blue and a translucent yellow and mixed them in somewhat equal parts. The rest I've written down in my glaze notebook so I do not forget.

I'm curious to find out what others think of this glaze. Do you like how this glaze draped over texture of the darker stoneware beads or is it a bit too much?

Monday, December 15, 2008

College Clay


There is ongoing construction at the local college I am currently attending. The crew had dug into the ground to lay pipes, my professor saw this layer of clay and put some in a bucket. She let it sit overnight and the next day showed it to her classes. This is what I was given. Of course I made it into beads! This clay is a soft buttery yellow. We put some into the gas kiln and it fired great at cone 10. The beads in this photo were fired to cone 4 in my electric kiln with a clear gloss glaze.

I wish we had some more of that clay. I would love to play with it some more!

Thursday, December 11, 2008

Listing Ramblings


Listing can be done at anytime, but I have come to believe it is a process which I think a person has to be in exactly the right sort of mood to do with creativity and playfulness.

Taking pictures of beads is a lot easier than the setup pottery takes. With pottery I have to dig out the light tent, and set up the lights. I have to make certain it is sunny outside to take advantage of the small amount of light that does come through the window. However, with beads I simply switch on the light and clamp it to the bottom of my tv stand. I put several pieces of white typing paper on the floor, sit crosslegged resting my elbows on my knees, and snap away.

I usually take 8-10 shots of each bead set I am planning on on listing and I try to shoot at least 10-15 listings at a time. I end up using 5-8 of those listings because there are times the macro camera picks up small defects I don't see with my naked eye. I love my camera! At those times I pick out the bad bead and reshoot at a later time or there have been times I've included the offending bead, but said in the listing that it was free because of the defect. I don't think I've ever sold any sets with a free defect bead, so on my huge list of things to do is to reshoot those beads and rewrite the listing. (Update, the day this was posted I did sell this listing with a defect freebie bead: http://www.etsy.com/view_transaction.php?transaction_id=12424863 Boy was I was surprised!

Other times I end up having what I call a fantasy bead (see above photo). The bead comes out much better in the photo than it looks in real life. That wouldn't be fair to a customer who was expecting a bead with all those colors. There have been beads that when taken out into sunlight looked exactly like the photo, so that's what I write in the listing. There have been times that the bead looked better in real life than in the photo. What to do? Reshoot. I do a lot of reshooting. I still have a lot to learn with basic photography but my goal is to take clear (not blurry) photos and portray accurately each bead in the best light possible without having the 'fantasy bead' effect. The bead in this photo shows up the pink blotches much more than the actual bead. It's a beautiful bead BUT if someone bought this bead they would be disappointed. So rather than create any more of them (I have four), I will use these four as Thank You gifts.

The listing itself is a different process. Every so often my mind works creatively and I think I write an interesting to read listing. But I have found that if my mind is BLAH that it is better to have a dry listing than something that is just trying to be funny. I can't force funny nor can I force creativity. When I occasionally have a witty listing, I suppose instead of listing I should be in the studio creating. Just a thought anyway.

Tuesday, December 09, 2008

Bead Colors


Right now I have the beads of clay swap beads firing in the baby kiln. I have another load tomorrow to fire in order to finish those up. However I am only able to put one layer of heavy beads in the kiln because they end up toppling in the high temperature and fuse together. It's a mess. The good news is that I am able to put one additional layer of teeny beads on top of those, but that is all.

What I need are some rectangle kiln posts. I'm hoping to approach my professor and ask her if I can make some rectangle kiln posts out of fire clay next semester. This would so solve my problem (and allow me to lower my bead prices, too).

Thursday, December 04, 2008

Recent At Home Projects


A few weeks ago I went one of the oriental grocery stores in my area to scout out some design possibilities. I came away with this fabulous wooden bowl. I knew I would use it for a mold but after an initial failed use with some stoneware clay put it on a shelf for some future thought. One of the projects in Ceramics I was to coil clay using an armature. The idea was to smooth the outside but leave the inside with the clay coiled in attractive designs.

I did the project and it was fun. I have done a bit of this at home but not by using spirals, but simply round 'dots'. What I learned in class was that it was possible to retain the texture of the coils but only if the clay was a certain texture. At the time the clay I was using was too new and not plastic enough. It came out okay but another student did such a beautiful job on his that I thought I would try again at home.

The clay I used here is Laguna B-Mix but it has been sitting in the reclaim bucket for a number of months. I was wedging a lump for wheel work and decided instead to utilize this bowl with the spiral technique. I had to let it sit overnight before it would pop out. I liked it so much I did it again with similar results. Today I will make another one. I suppose until this particular clay is available I will continue to make these.

I'm thinking of keeping the clay unglazed on the outside and using a dark liner on the inside, maybe a cobalt blue or a bright tomato or dark lime green. We'll see.

Swap Peek


The Beads of Clay yahoo group that I'm a member of is having a Bead Swap and they are a lot of fun. Last beads swap I probably shouldn't have participated -- I liked the beads I sent but they were not anything that I thought out ahead of time. They simply fit the theme and so I used them. This time I have a bit more extra time and was able to put much more time into the project.

I guess I prefer making round beads to pendants. I tend to go blank with a flat space but round (to me anyways) has so many more possibilities. The clay that I am working with is very old and plastic as it has sat in the reclaim bin wet for a number of months. It was perfect to use for this type of bead.

I have these in a covered container and will let them dry slowly. If I let them dry in the open air the added coils will dry too quickly and crack. How do I know that? I tried this technique on some beads before and that's what happened.

In any event, here they are and I should have them finished in the nick of time.

Tuesday, December 02, 2008

Kiln Opening


This is the gas kiln where I'm currently taking Ceramics I. It takes about 12 hours to get to temperature and as you can see, it is always filled to capacity. This is the first time I've been able to do gas firings to cone 10 so I was excited and thrilled to be able to help in the unloading.


This piece is one of a series where I started out with a small pinch pot before coiling it to the height and shape I envisioned. The glaze is called 100 year old Scotch and is a rutile. Very shiny and pretty. If I had to do it over again I wouldn't hold it in the glaze quite so long.


I could have put a handle on this but it is not very big and is easy to hold in one hand. This also began as a small pinch pot, then I began applying coils.


This was done the same way but I was aiming for a different shape. The coiled opening was more spontaneous than anything else.


This is the big one I have been working on all semester. It dried too quickly and the hairline cracks got a bit bigger in the final firing, but it held together. It won't hold water but it might hold a few umbrellas.