NKPdesigns

Friday, December 26, 2008

Wednesday, December 24, 2008

Christmas Eve Beads

These are a few which came out of the kiln this morning. Potters are always saying that each time they open their kiln, it is like Christmas morning, and that is true. Christmas is about surprises, the biggest surprise of all happened when God revealed Himself to the world through His Son. Jesus Christ, wrapped Himself in flesh and was born of a Virgin some 2000 years ago. Amazing love ...


So whenever I say "It's like Christmas morning opening the kiln," I'm not actually thinking of wrapped presents under a tree, but the way Jesus Christ wrapped Himself in flesh and entered this world -- the biggest present ever presented to all of humanity! Tomorrow will be a day I'm thinking about that as I'm taking these out of the kiln.

Tuesday, December 23, 2008

New New New


It is like I'm having the 12 days of firings and I'm on day 9. Lol! During Christmas break I'm trying to push myself and do new and different things with either glazes or forms or both.


These are a small textured nugget/round that I used a lowfire speckled glaze on. Most of the color burned out at the higher temperature, but it took the crystals and melted them in streaks and dots marvelously. The flower texture underneath is delicate, but easily seen.


This started out as a small porcelain round. I took some purple colored porcelain and rolled a tiny rope, attached it and applied a texture on top. This technique is facinating to me. I used some gray porcelain in this same manner in this batch, and I also combined the two colors together with textured ropes and dots.


I combined two glazes, one low-fire and the other mid-range fire to get this variety of colors. It is interesting and I do like it, but it would be somewhat challenging I think for a jewelry designer to pull all these colors together in a cohesive look. I do like how they came out, though.


These are the ones I am most excited about. The cobalt gloss glaze performed well in the indentions on each round. I want to find some more transparent glazes that will do this same thing.

Click on any of these photos to see the details of each bead and thanks for dropping by!

Monday, December 22, 2008

For Your Beading Perusal


Here's this morning's batch. I have one last and final white sprigged bead ready for the Yahoo Beads of Clay bi-annual bead swap. This last one was to finish off the batch of 15 that I signed up to be a part of. In the original batch, one didn't make it through the firing. I put a tad too much glaze near the hole and it melted onto the rod and it would not be removed! That happens to a few beads each batch. It's all part of the process.

The rest of these are small squares/rectangles and nuggets that I coated with a low fire china sea crackle glaze that I pushed to a much higher temperature. They turned out a nice transparent forest green. I also applied this same glaze to two smaller white sprigged beads. Mmmm... I like them. Do you?

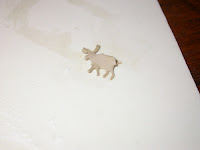
Also in this batch two of the moose pendants that I played with last week. Note to self: do more of these!

Sunday, December 21, 2008

Today's Bead Batch


I'm firing beads and listing as often as I can while I can. I'm pushing myself to attempt new glaze combinations, and these swirly smooth greenish brown rounds are my latest attempt. I had some shiny yellow rounds that I was not impressed with so I reglazed with another color on top. It's kinda like painting a wall in your house and putting on one color of a layer of paint on top of another underneath and the tone of one combines with the other to make a whole new color. With these are some varied textured rounds, too. Click on the photo to get a better look at all of these beads.

I used a different glaze on these blues than I normally do. I found a transparent cobalt blue glaze and all I did was fire this lowfire glaze at a higher temperature. These look identical to the two step process I had been using of first applying a cobalt blue stain and then a clear gloss glaze.

Saturday, December 20, 2008

Fresh From The Kiln


This is what came out of the kiln this morning. This bowl has some pink delicate scroll rounds, a bit bigger beige textured rounds of a new glaze that I am experimenting with ... I love how the scroll texture appears to be climbing out of the glaze instead of being recessed into the glass.


These whites are a new design for me. I'm thinking about putting together a video tutorial to show how they are done. This is an enjoyable bead to make and I am playing with all sorts of ways of applying these sprigs of clay.

Friday, December 19, 2008

Beads 12-19-08


These are the very last of the Porcelain Cane "Santa Fe" that I created a few months ago. It wasn't a large cane, per se, but I don't know if I'll be able to recreate it or not. I somewhat like the fact that there might only be this and no more. Truly a bit of One of a Kind (OOAK).

The others are the last of the batch of celery glazed beads that I mixed up from two separate glazes. I named them "Salad Greens" because they are also the color of iceberg lettuce.

In the kiln today are some scroll texture beads with a new glaze that I bought and never have used before. I don't know if it will come out like the commercial sample or not. We'll see. Also some pink delicate scroll beads, and I glazed some more sprigged beads with a clear gloss. It's all fun!

Thursday, December 18, 2008

Moooooose


I have had an idea in the back of my head for a while and today sat down and implemented it. The question was how do I treat porcelain clay like paper in order to use this moose die? The answer was to roll out a small amount of clay paper thin and coat it with either spray oil or baby powder. My first attempt was to spray the moose die with oil. Miserable failure. I cleaned it out and my second attempt was to sprinkle the paper thin clay with baby powder. That worked. I was able to slide in the clay and press down to cut out the clay moose. I had to hold it with one hand and gently lift out the moose with a small tweezer. I ruined quite a bit of them this way.


Enough survived, however, to put onto a pendant shape. The baby powder kept the moose(s) from sticking, so I simply wet the pendant and pressed it onto the paper thin clay moose. Success! Yay!


These are what I ended up with. This was fun to do but it sure did make a big mess in the studio. I have seen this type of thing be done by polymer clay artists and silver clay artists, as well. Now I have tried it, too. Fun!

Today's Offering


I pulled these out of the kiln this morning. Some have a scrolling texture pattern and others are a smooth round. I used a blue rutile glaze on them. The color variation from bead to bead is slightly different.

Wednesday, December 17, 2008

Bowlful of Greens


This is a bowlful of Green beads which I took out of the kiln this morning. Already another batch is being fired. While I can, while I have the time, I'm going to fire as much as I can. This batch was a great experiment in mixing two commercial glazes together to achieve a new color. I took a light translucent blue and a translucent yellow and mixed them in somewhat equal parts. The rest I've written down in my glaze notebook so I do not forget.

I'm curious to find out what others think of this glaze. Do you like how this glaze draped over texture of the darker stoneware beads or is it a bit too much?

Monday, December 15, 2008

College Clay


There is ongoing construction at the local college I am currently attending. The crew had dug into the ground to lay pipes, my professor saw this layer of clay and put some in a bucket. She let it sit overnight and the next day showed it to her classes. This is what I was given. Of course I made it into beads! This clay is a soft buttery yellow. We put some into the gas kiln and it fired great at cone 10. The beads in this photo were fired to cone 4 in my electric kiln with a clear gloss glaze.

I wish we had some more of that clay. I would love to play with it some more!

Thursday, December 11, 2008

Listing Ramblings


Listing can be done at anytime, but I have come to believe it is a process which I think a person has to be in exactly the right sort of mood to do with creativity and playfulness.

Taking pictures of beads is a lot easier than the setup pottery takes. With pottery I have to dig out the light tent, and set up the lights. I have to make certain it is sunny outside to take advantage of the small amount of light that does come through the window. However, with beads I simply switch on the light and clamp it to the bottom of my tv stand. I put several pieces of white typing paper on the floor, sit crosslegged resting my elbows on my knees, and snap away.

I usually take 8-10 shots of each bead set I am planning on on listing and I try to shoot at least 10-15 listings at a time. I end up using 5-8 of those listings because there are times the macro camera picks up small defects I don't see with my naked eye. I love my camera! At those times I pick out the bad bead and reshoot at a later time or there have been times I've included the offending bead, but said in the listing that it was free because of the defect. I don't think I've ever sold any sets with a free defect bead, so on my huge list of things to do is to reshoot those beads and rewrite the listing. (Update, the day this was posted I did sell this listing with a defect freebie bead: http://www.etsy.com/view_transaction.php?transaction_id=12424863 Boy was I was surprised!

Other times I end up having what I call a fantasy bead (see above photo). The bead comes out much better in the photo than it looks in real life. That wouldn't be fair to a customer who was expecting a bead with all those colors. There have been beads that when taken out into sunlight looked exactly like the photo, so that's what I write in the listing. There have been times that the bead looked better in real life than in the photo. What to do? Reshoot. I do a lot of reshooting. I still have a lot to learn with basic photography but my goal is to take clear (not blurry) photos and portray accurately each bead in the best light possible without having the 'fantasy bead' effect. The bead in this photo shows up the pink blotches much more than the actual bead. It's a beautiful bead BUT if someone bought this bead they would be disappointed. So rather than create any more of them (I have four), I will use these four as Thank You gifts.

The listing itself is a different process. Every so often my mind works creatively and I think I write an interesting to read listing. But I have found that if my mind is BLAH that it is better to have a dry listing than something that is just trying to be funny. I can't force funny nor can I force creativity. When I occasionally have a witty listing, I suppose instead of listing I should be in the studio creating. Just a thought anyway.

Tuesday, December 09, 2008

Bead Colors


Right now I have the beads of clay swap beads firing in the baby kiln. I have another load tomorrow to fire in order to finish those up. However I am only able to put one layer of heavy beads in the kiln because they end up toppling in the high temperature and fuse together. It's a mess. The good news is that I am able to put one additional layer of teeny beads on top of those, but that is all.

What I need are some rectangle kiln posts. I'm hoping to approach my professor and ask her if I can make some rectangle kiln posts out of fire clay next semester. This would so solve my problem (and allow me to lower my bead prices, too).

Thursday, December 04, 2008

Recent At Home Projects


A few weeks ago I went one of the oriental grocery stores in my area to scout out some design possibilities. I came away with this fabulous wooden bowl. I knew I would use it for a mold but after an initial failed use with some stoneware clay put it on a shelf for some future thought. One of the projects in Ceramics I was to coil clay using an armature. The idea was to smooth the outside but leave the inside with the clay coiled in attractive designs.

I did the project and it was fun. I have done a bit of this at home but not by using spirals, but simply round 'dots'. What I learned in class was that it was possible to retain the texture of the coils but only if the clay was a certain texture. At the time the clay I was using was too new and not plastic enough. It came out okay but another student did such a beautiful job on his that I thought I would try again at home.

The clay I used here is Laguna B-Mix but it has been sitting in the reclaim bucket for a number of months. I was wedging a lump for wheel work and decided instead to utilize this bowl with the spiral technique. I had to let it sit overnight before it would pop out. I liked it so much I did it again with similar results. Today I will make another one. I suppose until this particular clay is available I will continue to make these.

I'm thinking of keeping the clay unglazed on the outside and using a dark liner on the inside, maybe a cobalt blue or a bright tomato or dark lime green. We'll see.

Swap Peek


The Beads of Clay yahoo group that I'm a member of is having a Bead Swap and they are a lot of fun. Last beads swap I probably shouldn't have participated -- I liked the beads I sent but they were not anything that I thought out ahead of time. They simply fit the theme and so I used them. This time I have a bit more extra time and was able to put much more time into the project.

I guess I prefer making round beads to pendants. I tend to go blank with a flat space but round (to me anyways) has so many more possibilities. The clay that I am working with is very old and plastic as it has sat in the reclaim bin wet for a number of months. It was perfect to use for this type of bead.

I have these in a covered container and will let them dry slowly. If I let them dry in the open air the added coils will dry too quickly and crack. How do I know that? I tried this technique on some beads before and that's what happened.

In any event, here they are and I should have them finished in the nick of time.

Tuesday, December 02, 2008

Kiln Opening


This is the gas kiln where I'm currently taking Ceramics I. It takes about 12 hours to get to temperature and as you can see, it is always filled to capacity. This is the first time I've been able to do gas firings to cone 10 so I was excited and thrilled to be able to help in the unloading.


This piece is one of a series where I started out with a small pinch pot before coiling it to the height and shape I envisioned. The glaze is called 100 year old Scotch and is a rutile. Very shiny and pretty. If I had to do it over again I wouldn't hold it in the glaze quite so long.


I could have put a handle on this but it is not very big and is easy to hold in one hand. This also began as a small pinch pot, then I began applying coils.


This was done the same way but I was aiming for a different shape. The coiled opening was more spontaneous than anything else.


This is the big one I have been working on all semester. It dried too quickly and the hairline cracks got a bit bigger in the final firing, but it held together. It won't hold water but it might hold a few umbrellas.

Tuesday, November 18, 2008

Handmade Decals Preview


Take a good look at these beads. Click on them and have a closer examination. These babies are the culmination of over a year's worth of head scratching and befuddlement. I love the idea of taking my own design that I created from scratch and making a decal from it -- but I love the commercial decals too. They're just pretty.

In the recent past I've drawn a bunch of cartoon-y-type daisies and for a variety of reasons they just don't fire well on the beads. I don't know if it is because there are too many lines to deal with or what... but I have only a few that I have been satisfied enough to put in my store.

While watched a documentary a few weeks ago on fractals, a flood of ideas came to me -- the patterns in these fractals are hauntingly beautiful. I found a fractal program on the internet and began playing around, zooming in, changing the function a bit (it helps that I do have a good bit of math under my belt though I would flunk any test given to me at this point in time -- I got a "B" in Calculus over ten years ago, and I will forever and ever find a way to shamelessly brag about that.)

After I had zoomed into a fractal area that I particular liked, I captured it and placed it into my graphic editing program and went to work further altering it, then I printed a sheet of decals and realized I had nothing to mount these beauties on. Now, I didn't completely use fractals -- there are some beads that are from designs that I've picked up here and there, but the bulk of the designs are from the fractals.

The next day I spent trying to decide which clay body to use -- you would think this would not be a difficult decision, but it was -- Should I use Bright White? Medium White? Creamy White? Brown? Nah, not the brown -- then I had to decide after they were bisque fired if I was going to put down an underglaze or keep the white. I kept the white and applied a simple clear gloss and fired them to maturity.

Finally, days later, I was able to apply the decals. I cut them into strips and all sorts of shapes ... teeny little things they are! I fired them to cone 04 (which took me waaaaay too long to figure out) and when they came out I had already pre-cut the small delicate pink roses to apply.

The hard part was to resist completely covering them with the commercial pink rose decals. I realize I have a tenancy to overdo and I didn't want to overdo these.

All in all, I am thrilled at the way this batch turned out. I would like to go bigger with this sort of design, perhaps a teacup or two (or three). We'll see....

Thursday, November 13, 2008

Kilns


I'm SO glad I have two of these. It never fails that when I start a kiln load after not firing for a couple of weeks, invariably the one I am trying to start will not start. I'm getting a PLOG error on the one that is not working. I think the wires probably just have to be tightened, however, I bought another one earlier this year for times just such as these.

Nothing like being prepared, huh?

So I have a batch of high fire beads going and hopefully the kiln posts will not topple and HOPEFULLY they will be pretty enough to take some photos of. Hopefully.

Tuesday, November 04, 2008

I Bought This Today


I ordered this today and I am excited about it. I'm tired of my 'hang up a white dropcloth" photos and this will help me better present my pottery.

With this I may be able to enter a few contests. We'll see. I have a good camera, a Nikon 4500, old but reliable. I have good lighting (150 watt natural sunlight bulbs), but the background ... ugh!

Sunday, November 02, 2008

Malindi Crocs


You may be wondering why there is a pair of shoes on a pottery blog. I'm certain the suspense is overwhelming...or is it? This weekend is the Texas Pottery and Sculpture Guild sale at the Fort Worth Community Arts Center. I am the sales chairperson this year and I have to be there the entire sale. I got to thinking about what all that could mean in regards to my feet and so today I went and bought these comfy Crocs.

I am more into comfort than fashion and while part of me would love to scream all day about how these ARE fashionable, I know in my deepest heart of hearts that they are really quite hideous. However, with long dress pants only the most observant will be able to tell and since I'm not big into what people think ... who cares? It's a fact. I will be wearing these shoes to church from now on. My hubby has a business dinner in a few weeks, formal. I'm wearing these. Or maybe the high heels that I found here.

I already own a pair a Crocs and wore them exclusively all summer long. I have been wondering if there could ever be such a thing as comfy dress shoe Crocs. Also there are now waterproof Crocs which can be worn during the rain. I NEED THOSE!!!

I am probably the biggest Croc fan out there ... and that's no crock(pot)!

Thursday, October 30, 2008

More Pottery

The steady glow of the computer monitor convinces me that I must go outside soon and get some real sunlight or I might just fade away .....

I've been listing beads over on the NKP BEADS etsy site most of the day. The other half of the day has been organizing the TPSG coming up on the 7th and 8th of November.

By the way .... I was WRONG .... we are actually holding the Silent Auction for a group called Easel which will seek out and give donations to artists who are affected by hurricanes and natural disasters and the like. I'll have to google that group to see what exactly they do. So much I don't know about.


Here is but a small fraction of the bisque ware I meant to have glazed and fired by now. I keep getting sidetracked by other things. I created some more greenware yesterday. I had decided to throw ten tumblers, exactly alike in side and shape. Of course that didn't work out.


Instead of taking control of the clay, I allowed the clay to control me. I ended up with these. I seem to be into feet these days. It makes it easier to glaze and fire, that's for certain. Also, I hate making lids. So I am determined to make lids for any item until I don't hate doing it any longer. I used this same strategy for trimming and making lips thicker and handle-pulling, too.

Wednesday, October 29, 2008

Fractals


I watched a program on PBS last night explaining the history and development of fractals. It fascinated me to the point that I downloaded a free fractal program and started playing around. Wouldn't this look pretty on a round pendant or bead? Something to think about anyway.

Tuesday, October 28, 2008

Thank You Beads


I recently was asked how I decide what to give away as my Thank You gift when someone buys beads. As I began answering I realized that it was kinda complicated. First of all, I consider what has been bought. Is the customer buying big beads? Small beads? Formed beads? Painted beads? If there seems to be a trend, I tend to include a bead or two from that trend.

Sometimes the beads I put in as thank you beads are beads that I have not put in my store, nor will ever put in my store. Why? It is not because they are not good beads, but usually they are beads that do not photograph well. For example, I have some beautiful coral beads, but no matter what lighting I put them in, they come out pinkish. Well they are not pink. And try as I might with the graphic program, I can't make them come out their true color. Therefore, if I have what I call a "Fantasy Bead", I will reserve them for a thank you gift. Many times they are my most beautiful beads... and because they don't photograph well, completely unique!

Don't get me wrong, indeed, there are times that I include beads that are already in my store or fresh out of the kiln that week. But what I never do is put in a bead for a Thank You gift that I am not pleased with. I mean, the point is to have the customer fall MORE in love with my beads, not OUT of love with them.

Years and years and years ago, the first time I ordered beads online I was a bit disappointed. They came in a dirty plastic bag, no invoice, the envelope had been used I don't know how many times -- the thank you gift looked like something small and broken out of a candy machine. The next time I ordered beads (a few years later), it was fantastic. The lady had packaged these beads so that it felt like Christmas morning. I oooh-ed and aaah-ed myself through each goodie layer and I never forgot how great that was to open up and gaze at those beautiful beads.

So I do take time to think about packaging and thank you gifts. I want to wow my customers. I buy soft fleece from the fabric store and pretty ribbon and I always use new plastic bags if the bag is scuffed up from being with the other bags.

How many beads do I give away as Thank You gifts? That depends on the size of the order. I try to be consistent. However, I probably should keep track of exactly what I've given and to whom, but I don't -- at least not yet.

The bottom line is that my customers and I each love beads and so I try to say Thank You the best way I know how -- with a bead!

Texas Clay Festival


This was my first time to this festival and it was SO MUCH FUN! I enjoyed every demo and wished I could have been in three places at once. This is held in Gruene (pronounced 'Green'), Texas every year and there is incredible pottery to buy and incredible demos to watch. There were three tents set up with demos going on in each one at the same time. So difficult to decide which one to see. One can only hope a few of these demos that I didn't get to see ends up on You Tube. Wouldn't that be great?


The man pictured in these three pictures is named Vorakit Chinookoswong (V. Chin for short). His work is stunning. He grew up in Japan (but I believe he was born in Taiwan). Being a potter in Japan is apparently very different than in the United States. There you have to work your way up to the wheel by cleaning and wedging. Even when you get on the wheel, you are limited to a certain grade of clay. And you must repeat the same shape over and over and over and over and only then can you graduate to a different shape. One one hand, I hate that idea. On the other hand, I can see much value of some of that amount of practice. For example, I can see myself being told to do a certain shape over and over, but I would want to choose the kind of clay I throw. It's the American way! lol! It was fascinating to listen to V. Chin as demoed and shared what it was like to be a potter in Japan and what it is like to be a potter in America.


Every year this group of potters holds a silent auction (for scholarships and things) and this year they also decided that some of the money would go to help rebuild V. Chin's studio which was destroyed in Hurricane Ike. After watching him demo, I could see why V. Chin is beloved by so many potters. His enthusiasm and positive outlook is to be much admired. That is why I am thrilled my pottery guild, the Texas Pottery and Sculpture Guild, will also be holding a Silent Auction for V. Chin at the November Christmas show (November 7th & 8th at the Fort Worth Community Arts Center.

Visit V. Chin's Gallery online today. If you have never seen his pottery, you will fall in love with it. And if you live in the DFW area, please come to the TPSG pottery show and bid on a piece of pottery made by guild members which will help rebuild V. Chin's studio.

Monday, October 20, 2008

Pretty Beads


I was playing with my husband's calligraphy pens and these are what I ended up making. I still have to cover them with a clear gloss and fire them again, but I had fun experimenting.

Slab Thrown Mugs


The assigment was to throw slabs and make 6 mugs, exactly alike. This was probably the hardest assignment so far in the class because it is very hard to make anything that is similar (for me anyway!). But here is success!

Whistles


I was in the mood to glaze the other day, and I think that is part of it -- I MUST be in the mood to glaze or I just draw a big b l a n k. These whistles had also sat neglected in the bisque form on my shelves, but now they are glazed and I am happy with how they turned out.


Here's the bad news. The apple whistle I made fell during the firing and melted with the small teeny vase. They are now one -- forever!

Little Teapots / Spicepots


I made these so long ago. Then they sat on my shelf in the bisque state for months and months until I finally glazed them last week. I used to be so good at doing everything in a timely manner, but sometime in the last year or so not so much.

I just couldn't decide what it was I had wanted to do with these. I remembered it was a simple idea but I was determinded not to glaze until I either remembered or came up with something new. Then, the other day I was poking through my shelves, it was shortly after I knocked the handle off a mug, when I remembered SIMPLE GLAZE AND LEAVE BARE CLAY ON HANDLES AND SPOUNTS AND LIDS. So easy. I can't believe I forgot, but I remembered (as I usually always do eventually) and here they are. I'm pleased with the results.

Friday, October 17, 2008

Experimenting with Shapes


I don't have any photos at the moment, but I have been experimenting with some home-made stamp designs. Lately I've been obsessed with squares, rectangles, circles, ovals, etc ... patterns have always interested me. I have a bunch of stamps ready to go into the kiln for a bisque firing and then I will be able to stamp shapes, teeny tiny shapes, into some of my beads. Come to think of it, I do have the bead which started this particular obsession. Here it is:

I stamped these beads with a square tip of a drill bit set. As I got to looking at it, I started thinking about mandalas and the different geometrical shapes on those and that got me wondering how I can fit such a lovely texture pattern on a bead.

Square Hollow Forms


In open lab I decided to get play with the square hollow extruder die. It took me about 20 minutes to try to figure out how to put it together and then I set about extruding a small amount of clay.


It took me a while to figure out what to make. I should have thought ahead and looked at a book I have on this subject before going to class. However, it was all one of those spur of the moment type of projects so I had to think really hard. I swear my brain HURT from all that thinking -- worse than MATH! Finally I decided to make tea candle houses.


I had a bit of square hollow clay forms leftover so I made this small square/round mug. Let's hope I don't break off the handle.

Big Vat


Here it is. It is finished. Unfortunately there is a teeny tiny horizontal crack near the bottom. It does not go all the way through the piece, but it probably will fully crack either in the bisque fire or the glaze firing. I don't know. Who wants to place a bet? Or should I just break it up into little bitty bits and reclaim the clay? I don't know. I'm open to it all.

Because I'm CLUMSY I have all but gotten a bit detached to most of my pieces, this one included. Or at least I try. I think it cracked because I placed it within about 5 feet of one of the bisque kilns in the classroom. That was stupid. Really dumb. I should have known better. I would never do that in my own studio. Of course, the kiln is in the backyard so it is a mute point. However, in the future I will keep this in mind.

I will make and continue to make careless mistakes until in the very fiber of my being I automatically avoid them. Someday. It's all a learning process, right?

And this morning, for the third time in a row, as I was moving the bisque/greenware around the shelves to figure out what my next kiln load should be, I again knocked a mug and the handle flew off. Again. I'm a bit frustrated with myself. I liked this mug. I liked the last mug. I really liked the mug before that.

This blog is for my successes and my failures and my growth as an potter. Aren't you excited to see that I have room for lots of growth. It is way much nicer to have room to grow than already knowing it all. What would be the fun in that? Discoveries are great and fun and in time I will have more successes than failures and maybe in time I will become less klutzy. Yes?