NKPdesigns

Saturday, October 10, 2015

Glazing Chowder Mugs

I had this fun project of making chowder mugs.  I was going to make 6 mugs about 24 ounces each and these are the photos of that progress.

First I had to figure out about how  big to throw them.  I had a couple of false starts but eventually got close.  I am definitely not a production potter, so these are not exactly exactly the same size, but they are close enough.

After they were thrown, I put them into the kiln for their first firing. Unfortunately one had a small crack around the top of the handle after it was finished, so I had to trash that and do another one.  Another week or so passed and it was fired.

Finally there were six again.  The next step was the glazing.  First I sanded for rough spots, especially around the handle.  If I get it too smooth the glaze runs like crazy so it is a definite balancing act.  Then I rinsed off the mug so that there will be no dust. 


I applied black underglaze ink into the initials of my 'belly button' potter mark and also to the bottom. 

The next step is to wax the bottom of the mug as well as the "belly button'.

I have a small baking pan that I very slowly melt wax over the stove.  I have the exhaust fan going because the fumes from the wax are toxic. 

The worst part about waxing is the ever present peril of dripping wax on the sides.  If that happens (and it does very frequently), I scrape off the wax with a sharp razor and sand the area. If the wax is not completely gone the glaze will not stick to that area.

I don't want the glaze to stick to the bottom of the mug. If there is glaze at the bottom of the mug, the mug will stick to the kiln shelf. The glaze is basically glass on top of the pottery which when it is fully matured, i.e., 'vitrified' also has the same chemical properties as glass.  I like to think of a vitrified piece of pottery as opaque glass. 

Here they are, completely waxed and ready to be dipped into the container of glaze.

I don't have a big enough container to dip the entire mug, so I decided to half dip one side and then half dip the other. 

You may notice that there are more than six mugs. That is because I did a few extra in case something awful happened during firing, that I would have enough for my custom order.


I am using a glaze that I mixed up via the book "Mastering Cone 6 Glazes" ...it is a High Calcium Semi-Matte glaze with the recommended amount of cobalt carbonate in an amount that will not leach into the food.

Poisoning your customers is never a good idea.  ;)


The next morning I placed them all in my digital kiln and set it to fire all day. I use the 5 phase firing ramping schedule found in the back of the book, "Mastering Cone Six Glazes". 

The first time to program a digital kiln is a bit nerve racking, it's true.  However, once the firing schedule is programmed, it stays there under 'user one' and is a piece of cake to refire. 

The kiln fired all day and shut off about 9 pm that night.  The next day about 5 pm I was able to crack the kiln open and about 9 pm that night unloaded it.  I think these turned out nicely. Do you?


Wednesday, September 09, 2015

Custom Mug

 It's super fun when someone messages and says, "Hey, I want a mug.  I don't care what shape or color. I just want it to hold a certain amount of liquid....but I want it to have surface decoration like you do with your beads."  (not an exact quote of course, but a fair simulation)
 I had my doubts about the design, about the color scheme. I agonized over it more than a few times.


I toyed with the idea of bright red daisies against a yellow background.

I toyed with the idea of a simple clear glaze over the entire mug.


In the end, this is what I decided.
 The surprise inside reminded me of the "Party in a Cup" series I created when first starting making pottery.

I always meant to do more of those ...so it's nice that there is a bit of a party going on in the bottom of this mug.

The bottom developed a teeny surface crack in the bottom during the firing.  It poses no problems.

When I put this in the microwave on high for two minutes, the handle was cool to the touch (score)!


Near the bottom of the belly is my potter mark, my three initials stamped into the clay.

Had a great time with this custom order. I always say, "I don't do custom orders."  But if you want a mug and you trust me with the design and implementation, I'm game if you are.


How much does it hold? It holds 3 cups of liquid comfortably (24 ounces). 

Tuesday, August 11, 2015

Slip Goo

I had this idea to cover the surface of this very big mug with white porcelain slip ...then I could use underglazes and get all painterly artistic about the decorating aspect of it all.  Yeah, good idea!  Except the slip was quite gooey and the brush wasn't really working.  I did the best I could. I went back and reshaped it a bit. It's drying now.  I'll trim and attach a handle later.


--UPDATE--
I couldn't help but think this would be a lovely teapot, so that's what I did. I ended up forming it into a teapot.


Monday, August 10, 2015

Math and Custom Orders

I say all the time, "NO ... I don't do custom orders...."  .... that is because, well, I don't work well under stress.  That's just how I am.

However, when I have conversations that go something like this:

Can you make (fill in the blank) and take as much time as you need ......

OR

I want this to do that, and I don't care what it looks like afterward, you decide.

OK  ...yeah, that I can do ....

I got a request to make some 24 ounce chowder mugs and in the process of doing those, got another request for a 24 ounce mug .... and the above requests were met with a lot of smiles on my part.

I started immediately and have some decent size mugs drying on the shelf, right now! But I really don't know how much they are going to hold so I got to wondering and thought surely there are some online calculators that can determine volume for me and yay, there were. 

First I had to find a calculator to figure out how much something vertical would hold:

http://www.calculatorsoup.com/calculators/construction/tank.php

And because it was a large volume calculator, I had to convert the gallons to ounces. I typed Gallons to Ounces into google and a calculator popped up.

SO ...now I know in order for a mug to hold 24 ounces, it should have a finished height and width of 5 inches high and 3.5 inches wide, and that is being filled 1/2 inch to the top. 

Therefore, I need to throw to 6 inches high and 4 inches wide ...that should do it!

However, the mug in the photo above is not straight up and down.  When it is dry, when it is glazed, when it has shrunk as much as it will shrunk, it will be about 3.25" on the bottom, 5.5" at its widest and 4.5" across the top.  It will be about 3.5" tall.  

But the unfortunate thing about this volume calculator is that it does not take into account the curves involved!  Oh the curves!  The next best thing is to go to Etsy and search for 24 ounce mugs, then see which shapes most likely match mine and see what those measured.

And in less time than it takes me to sneeze (practically) I find that a finished height of 3.25" and 5" wide at the top will do the job nicely. 

I make things really hard on myself at times.  So the question: will this mug on top hold 24 ounces? I think it will.  


Tuesday, July 21, 2015

Glaze Making

I am working on a stable/safe non-toxic cone 6 studio glaze.   I want to end up with three (Light, Medium, and Dark in values) .... I've been meaning to tackle this for a few years but it has take me this long to gather up the chemicals I feel safe working with.  I have a base glaze from Mastering Cone 6 glazes and the safe levels of the colorants. I'll be leaching them anyway, just in case, of course.   Here's a Vine of the supplies and tools I have gathered on my workbench.


Update: 1st Test glaze is made ... It is crazy how nervous I am about using it in my kiln. Crazy crazy. But excited. But nervous. Oooo...the beads will be beautiful, don't you think? What color will they be? I HAVE NO IDEA .... they might be blue or red or green or a bit of yellow or all of it in various hues. Or it could be brown, muddy muddy brown. I used a base glaze (clear) and added colorants in various amounts. I did write it down though so it can be duplicated (well, as much as I am able to duplicate things) ...

Monday, July 13, 2015

Peek At My Upcoming Auctions on Ceramic Art Bead Market

Here is a collage of some upcoming auctions I hope to make over at Ceramic Art Bead Market. I have the photos all done, I am just working on the descriptions at the moment.  Tonight after 9 pm I am going to tally up all the entries for the bead giveaway and announce over there who is the winner.  Because I used up the first comment with an additional photo of the beads, I am planning to use the number 2 and # of entries instead of 1 and the # of entries over at random.org.  Makes sense, right?

And at some point I will start adding these photos as auction listings on Facebook (ceramic art bead market)

Lets see ...what else is going on in the world of pottery? Oh yes, I cleaned my studio so I can again throw on the wheel. I have a custom order for chowder mugs and I am going to make them about 3.5 inches wide and about 7 inches deep, with nice thick handles for holding. That's the plan anyway.  Lets just see how that goes for me, okay, ha ha! 


Thursday, July 09, 2015

Cobalt Blue Delicate Scrolls


I have been attempting a glaze match for a couple of years for my Cobalt Blue Delicate Scroll beads that appeared in the book "Bohemian Inspired Jewelry". The bead that is the second from the left is the original.  The third and fourth from the left are previous attempts. The first bead from the left is the newest attempt.  Fail.  I thought yesterday I had finally nailed it .... but this side by side comparison shows differently.  These are all the same porcelain clay body, too.  Who knew there were so many shades of cobalt blue?

Wednesday, July 08, 2015

The Three Little Pigs


My granddaughter is somewhat obsessed with this story...so I am too. Here are the famous little ones along with the mama pig AND the Big Bad Wolf !  Mama Pig started the entire story by deciding it was time for her three piggy sons to move out ...while she gave them good advice, only one followed it.

The Big Bad Wolf is deliciously scary to my granddaughter.  She will suddenly announce, "OH NO, the BIG BAD WOLF" then she will scream and begin to run away.  

This is the second set of these beads I have made.

Tuesday, July 07, 2015

Come Celebrate With Me

I had a bit of a tease yesterday on my facebook page regarding these beads.

They are especially chosen from the batch that came out of the kiln yesterday.

Today, July 7th, marks 4 years since my very last radiation treatment.


My cancer was removed by surgery and as a precaution, I had 25 radiation treatments and 2 rounds of chemotherapy.  That was in 2011.  And today I am still cancer free.  I have one more year before I am declared by my doctors to be in complete remission, but for right now, I am cancer free.  And that is enough.

Please come celebrate with me!  To win these 27 beads, join the Facebook page Ceramic Art Bead Market .  Leave a comment on the giveaway picture that matches the one above, and in a week I'll use Random.org to pick a winner.


Monday, July 06, 2015

Bead Load in Big Kiln

These are all the beads which came out of my big kiln this morning. It took about an hour to remove them from the rods and sort them onto this tray.    Beside the tray are the rods ...lots and lots of rods!

Tuesday, June 09, 2015

Yawn!

I started my big kiln yesterday morning ... or at least I thought I had started it.  So there it was, 3 pm in the afternoon before I decided to go into the kiln room Hubby built to see how far along the burn had progressed.  And the digital display was blinking its error message and internal temperature (about 200 degrees F).

I turned it off and stared at it for a bit.  I thought, "What did I do wrong?"  It took me a few minutes (some days I am slower than others and obviously at that moment my brain was on sluggish mode).  I realized I had not turned on the timer.  So I turned on the timer for about 12 hours so that if the kiln over fired it would turn off. I reset the digital and stood there and watched it.  I heard the relay click for about 4 minutes without the temperature rising. 

I have this bad habit of going to the worst possible place in my mind.  At that moment all kilns were doomed to misfire. No kiln would ever worked right if I owned it, and on and on and blah blah blah.  Then it dawned on me that I forgot to push the button on the kiln setter.

I know I know ....why do I have a timer, a digital AND a kiln setter?  Yeah, well, I ordered both functions, wanting them to work separately but the company who took my order didn't understand what I wanted so basically I ended up with this very very safe kiln (that won't fire if I don't turn everything on to work in unison). 

I turned off the digital again, pushed in the plunger, reset the digital and voila!  Finally, the temperature began to rise.

BUT it was 3 pm in the afternoon and I had it on a slow bisque firing because of the heavy handbuilt items.  I wasn't thinking.  I often forget to think.

It finally finished about 2:30 am in the morning. I suppose I could have gone to sleep but I couldn't sleep until the kids got home, either, when they were teenagers.  That's just how I am.

I won't be able to unload until this evening probably.  That's okay. I loaded up the smaller bead kiln about an hour ago. It's not digital. It's just a kiln setter. So I have to go turn it up every so often, and looking at the clock just now, it is time to turn it up again.

Have a great day and thanks for stopping by!
Natalie

Sunday, June 07, 2015

Yay for Family and Friends

Arches National Park
Hubby and I spent time with family and friends all last week.  It was a bit weird not being on the computer but I did sneak time with my phone from time to time.

We ended up going on a loop from Southern New Mexico to Northern Arizona (spent a few hours at the Grand Canyon) to Southern Utah (saw a couple of national parks) back to Taos, NM and then home to Texas.

I have a method of making clay while hubby drives the car. I hold on my lap a gallon size Ziploc bag that has about 3 lbs of clay.   I also keep a couple of dampened paper towels nearby.  I form beads one by one and place them in a small paper bag for drying. The clay can't be too wet or too dry.  Too wet and I can't make a bead and too dry and the clay dust will go everywhere. 

This week I have a huge load of beads to bisque fire and going in with those will be some cups and bowls and hand-built objects that I worked on over the last few months.  I also am planning a kiln load for glazed beads for the other kiln.  Because they run on different electrical outlets they can run at the same time.  Yay.

The photo above is one I took on my phone.  I am a bit surprised at how nice these cell phone cameras can be.  I will have lots of inspiration in the months to come.


Tuesday, May 26, 2015

Birdie Mold

The last time I took my bisque beads out of the kiln, I discovered that I had forgotten to insert a stringing hole into a tiny bird I had formed.  Today I took that bird and two pieces of clay and made a small mold from it.

I also took 5 pattern greenware stamps that I created and tested them out.  I liked three and didn't like two of them. So back into the recycled clay bag those two went.

I was going to glaze fire today but I actually forgot. I was sitting on my couch sipping coffee. Then I was printing out postage and double checking packages and sealing them up.  By the time I looked up, morning was gone.  It's a 12 hour firing and I don't want to be up at midnight.  Tomorrow!


Monday, May 25, 2015

Glazing and Photo Taking

I spent much of the weekend glazing beads.  I was going to fire the kiln today but other things are going to take up my time and I might not be able to remember to turn up the kiln at regular intervals.

Earlier this morning I took 97 photos and three were worthy.  For some reason every so often my camera goes on strike and will not focus properly.  Nothing much to do about that other than go back and do it all over again, which is what I plan to do before it starts raining again.

Lately I have abandoned my indoor photography studio, i.e., the closet, in favor of sunnier areas on the back porch.

This time of year is favorable for taking outdoor photos. When summer gets underway it will not matter what time of day I go outside. The light will be too harsh or too dim.

I am not a perfectionist, or at least I do not think I am.  I do like natural lighting and most times my beads look great in my photography 'closet' ...but I never quite seem to get the lush look of the shiny that beads are loaded with, and the natural lighting outside seems to do that.

It's Memorial Day, a day to remember those who died in service to this country ... so if you live in America and enjoy the freedoms this country offers, rejoice and remember those who helped to make it possible.

Thanks for stopping by -- Natalie

Thursday, May 21, 2015

Bisque Bead Buildup

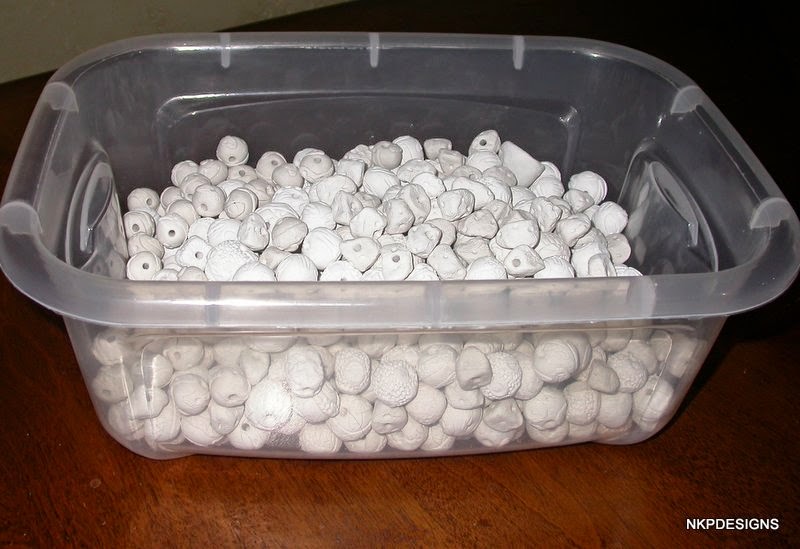
This is how I relax.  I take a ball of clay on my lap and form beads.  I am glad that though my fingers are sprained, I can still make beads.  They are better today than yesterday and tomorrow they will be better than today.

When this 'shoebox' is full, I will put them into my smaller bead kiln for their first firing. There are lots of styles of beads in here. 

I typically create about 20-30 beads per sitting, and every 10 or so beads I change my texture tool, or the shape I am making.  I am left with a lot of different styles of beads.  Glazing takes a lot more effort.  I have to choose the glazes, set up the table, do a lot of cleaning up afterward.  The end result is always happy and fun.  Lately I've been working with porcelain and I don't know why I don't make more pendants. They sell really well, but I do like the simple round, taking it and attempting to decorate it in such a manner that it is not so simple any longer. 

Hey, thanks for stopping by!  --Natalie